Exchange Online - Certificate Based Authentication - Step by Step
Microsoft released to GA the new version of Exchange Online Management module, version 2.0.3 at the time this article, which introduces Certificate Based Authentication for PowerShell sessions. Basic Authentication has been already deprecated and originally planned for removal in October 2020 but due CoVid-19 outbreak this has been postponed to 2021 as you can read here.
I have been using the module preview in production for quite some time but held back publishing this article so to have all places in place as GA.
Exchange Online Certificate Based authentication - Register Azure Application
The first step to deploy Certificate Based authentication is to register a new Azure Application. Navigate Azure Active Directory in the Azure portal and select App Registrations (alternatively use the search function which is what I usually do)
Testing clickable images:

In the app registrations under Owned applications we can list all applications that we registered under our account, in my case this is still empty, and under All applications as the name implies all application registered tenant wide.

Click on the New Registration and fill the various fields accordingly, unless you have specific needs all default values should suffice for most configurations/deployments. I am assuming a single tenant deployment in the following example
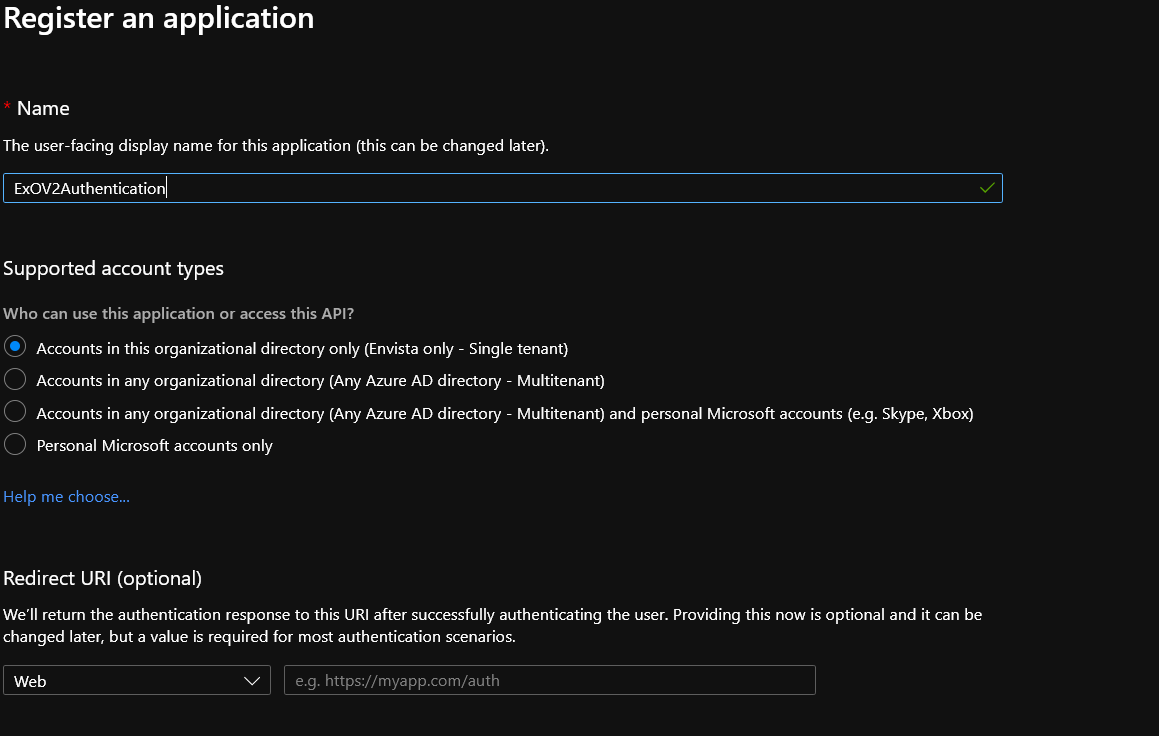
Once done click on the Register button, provision will only take a couple of seconds.

Note: The only field really needed in the Name one just be sure to choose a descriptive name that is easy for you to remember.
Exchange Online Certificate Based authentication - Grant API Permissions
Once the application has been registered we need to configure/grant API permissions that will define what our application can and cannot do. Either select API Permissions from the left blade or from the link directly below the API properties and select Add permission
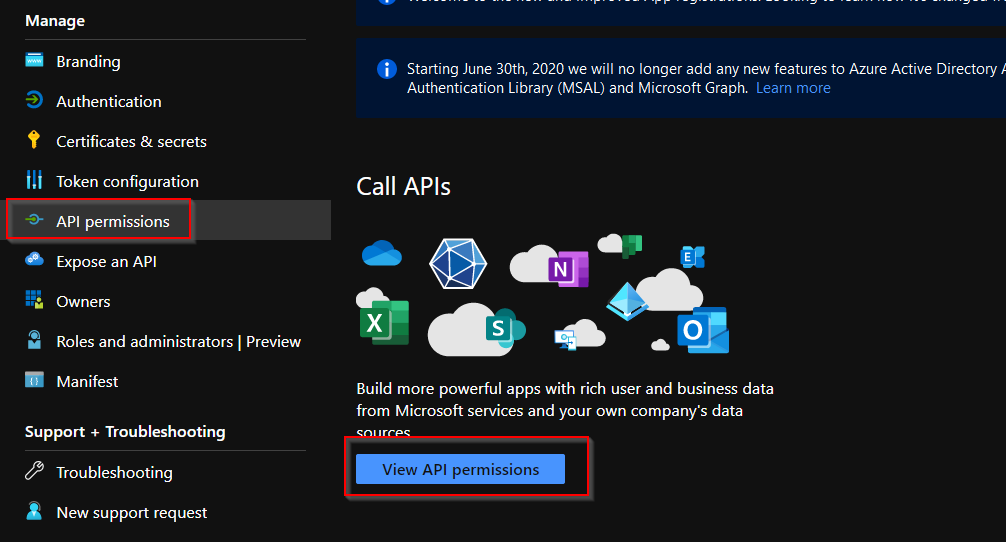
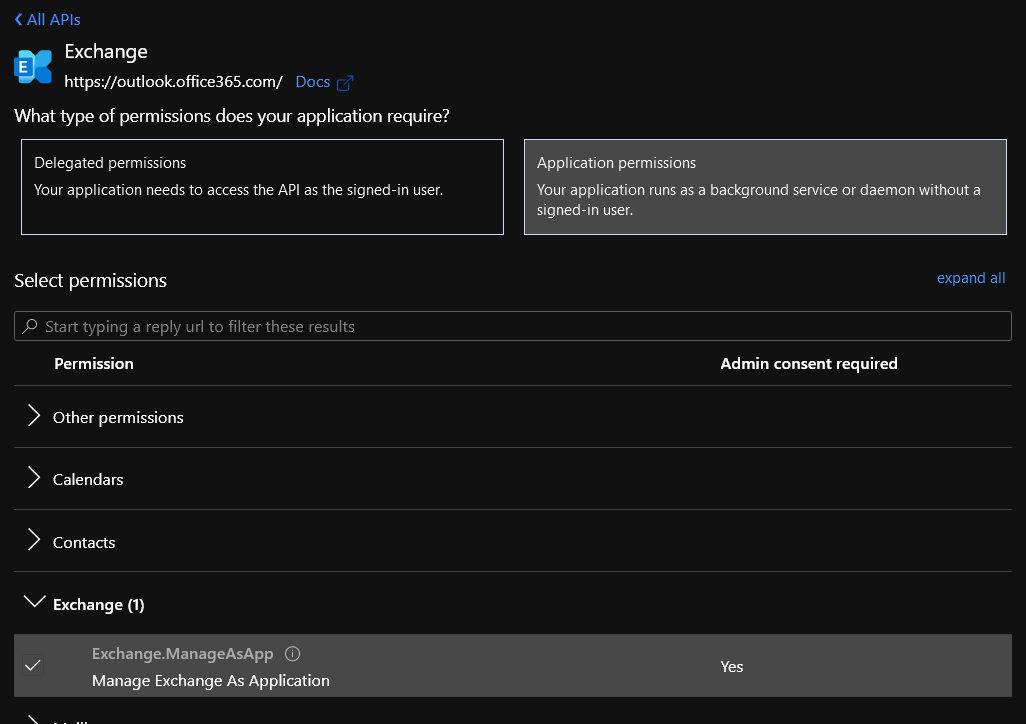
From the Request API Permissions scroll all the way down the Supported Legacy APIs and select Exchange, Application Permissions and finally tick Exchange.ManageAsApp under the Exchange section
Note: I will not go into much detail as much has already been written about this but Exchange does not natively support new Graph API that’s why Exchange is listed under Legacy API.

The last step involves clicking the **Grant Admin Consent for

Exchange Online Certificate Based authentication - Configure Authentication
With the application created configured in AzureAD we need to configure authentication against AzureAD. When using application permissions model authentication is performed via a client secret, a token, or a certificate. Token authentication is considered, rightly so, less secure for this reason only certificate one is supported by Exchange Online/Microsoft.
In the scope of Exchange OnLine authentication it is unimportant if we’re using a self signed or publicly trusted certificate as long as we have the associated private key.
You can easily create a self-signed certificate via PowerShell with the following command:
$paramNewSelfSignedCertificate = @{
    Subject           = 'Exchange Online Background Process'
    CertStoreLocation = 'cert:\CurrentUser\My'
    KeySpec           = 'KeyExchange'
    FriendlyName      = 'Exchange Online Authentication Certificate'
}

New-SelfSignedCertificate @paramNewSelfSignedCertificate

# Output
Thumbprint                                Subject
----------                                -------
1B1541D37888EFECD058B528524764G0EF8608D4  CN=Exchange Online Background Process
Note: Certificate will be automatically installed in the local certificate store under User / Personal Certificates and have, by default, validity of 1 year.
Open Certificate Manager MMC console and under Certificates Current User / Personal / Certificates right-click on the certificate and select All Tasks / Export. Just follow the export wizard be sure to select Do not export private key and select CER as the export format.
In the Azure Portal select Certificates and Secretes from the left blade and Upload certificate navigating to the path where the certificate has been exported/stored

Note: Write down the certificate thumbprint displayed in the Azure page as we will need this later on.
Exchange Online Certificate Based authentication - Grant permissions
As I mentioned in the Grant API Permissions paragraph Graph API does not support any Exchange management operations nor we can use Exchange RBAC model as that only applies to user objects not applications, like in our case, which are represented by a Service Principal. What we can do is granting a AzureAD Directory Role to our application Service Principal.
With the Azure AD blade selected go to Roles and administrators and select Exchange Administrator confirming with the Add Assignment button

In Select Member windows you will need to search application by GUID and select it
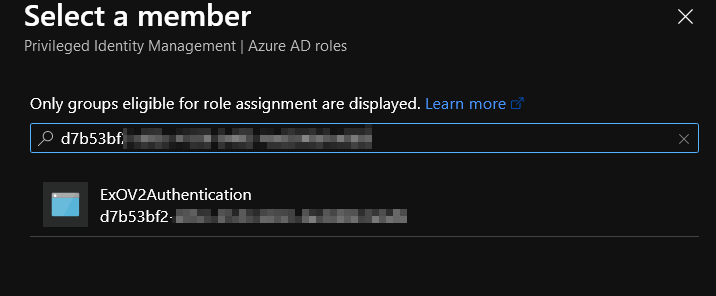
In the Add Assignment page be sure to select Active under Assignment Type and tick the Permanently Assign checkbox
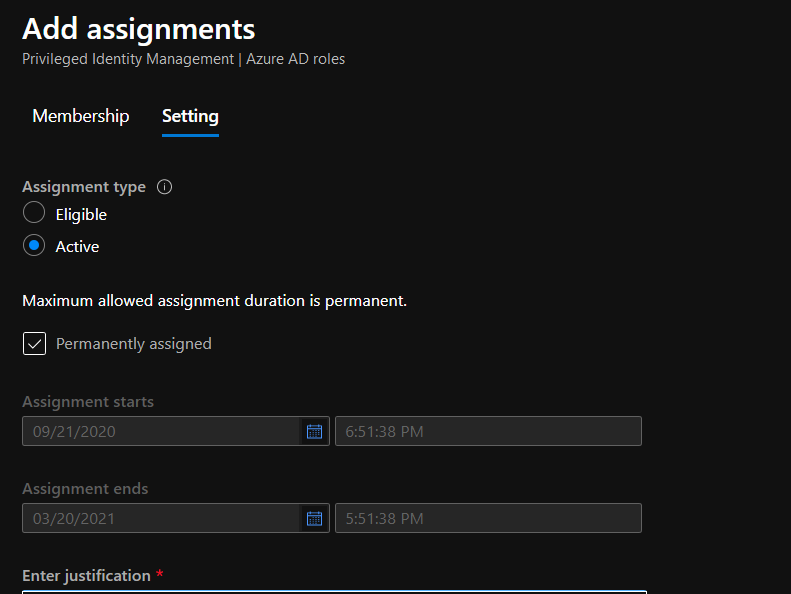
Once configuration is complete you will see a page similar the following

Where you can review applied configuration and make any required change.
Exchange Online Certificate Based authentication - Testing connection
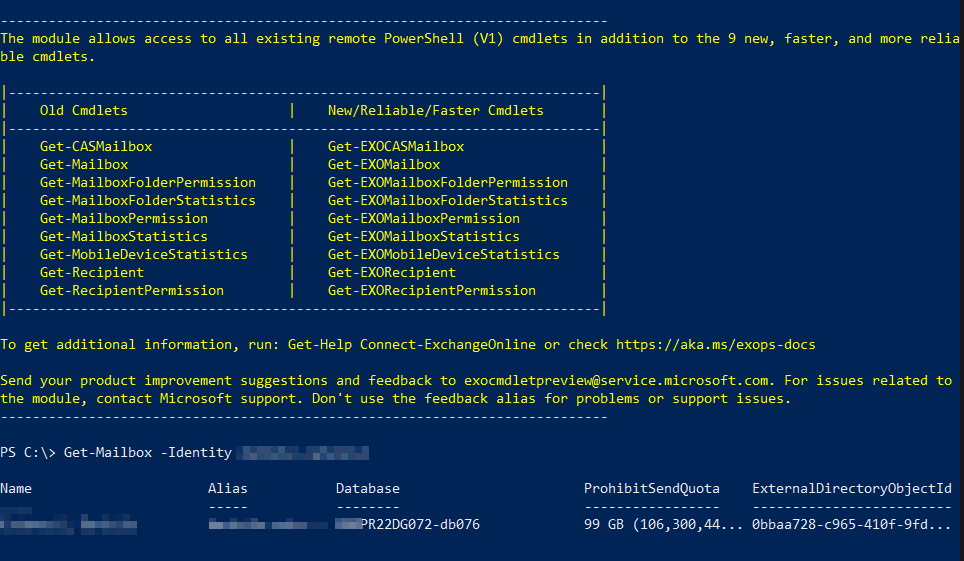
After all the above components are in place it’s time to test our configuration. Assuming the Exchange Online Management PowerShell module version 2.0.3 is installed we can issue the following command to establish a connection
$paramConnectExchangeOnline = @{
    CertificateThumbprint = $certThumbPrint
    AppId                 = $appId
    Organization          = $exchangeOrgId
}

Connect-ExchangeOnline @paramConnectExchangeOnline
Where certThumbPrint is the certificate thumbprint we created and uploaded to Azure, appId is the ID of the application we created and exchangeOrgId is the name of the tenant in the form tenantName.onmicrosoft.com
And here’s the result
Closing notes
This was quite a long post but steps to get up and running with Exchange Online Certificate based authentication are numerous even if not difficult to implement but well worth following.
Certificate Based authentication resolves a number of challenges administrators had to face up to this point, chief among all storing credentials which is inherently insecure.


Leave a comment