
Setup an internal PowerShell Repository with NuGet Step by Step
PowerShell repositories
If you follow my blog you probably know my GitHub where I share modules like the IT-ToolBox or handy standalone Functions that I developed to solve specific issues.
In my posts I often talked about PowerShell Gallery which you probably already used to install a module released by Microsoft or other developers.
Both are great tools when sharing code with a large audience over the internet, GitHub Private repositories are scope of this article, but a large chunk of my work involves developing modules that me and my colleagues user internally for automation purposes. These modules usually leverage technologies that are available only in my work environment and sometimes implement functions that would not have much sense outside my company.
One of the main issues we faced when initially started development of our own modules is ease of distribution to other team members for this reason we’ve setup internal NuGet repositories which can be used an internal PowerShell Gallery.
Required tools
Here’s what you will need to follow this article and setup your own PowerShell repository:
- A copy of Visual Studio the community edition will do just fine and it’s free
- The ASP.NET and web development workload installed here’s a guide on how to modify an existing Visual Studio installation in case you don’t have the appropriate workload installed already
- A server running a supported copy of Windows Server I am using Windows 2019 but 2016 will do just fine
Note: If you do not have or cannot install Visual Studio at the end of the post I have posted a link to my GitHub Repository
Create the Visual Studio Project
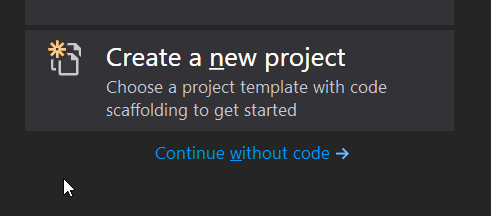
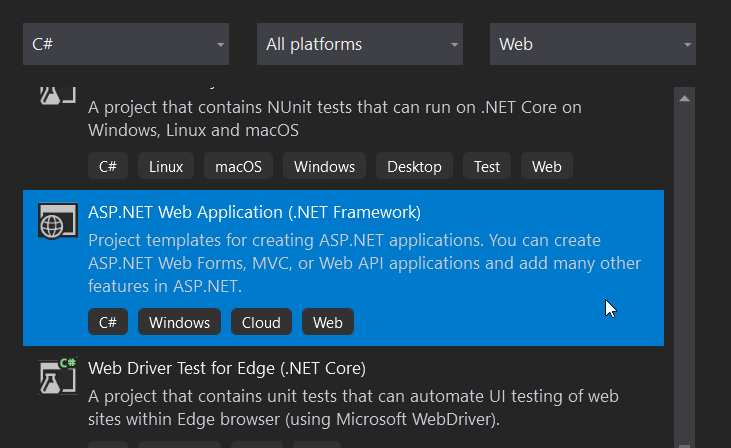
Once all requirements are in place open Visual Studio and create a project using the ASP.Web Application (Visual C#) template.
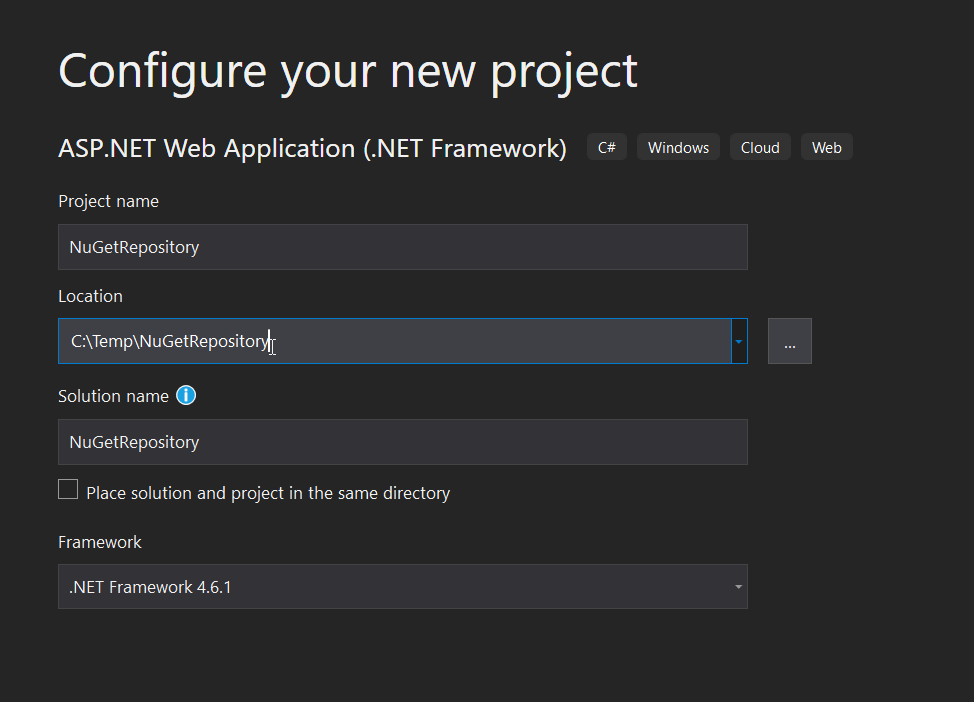
Application name is not important just avoid NuGet as this would create a conflict with one of the packages we need to install as part of the dependencies, in my example I’ve used NuGetRepository but it can really be anything
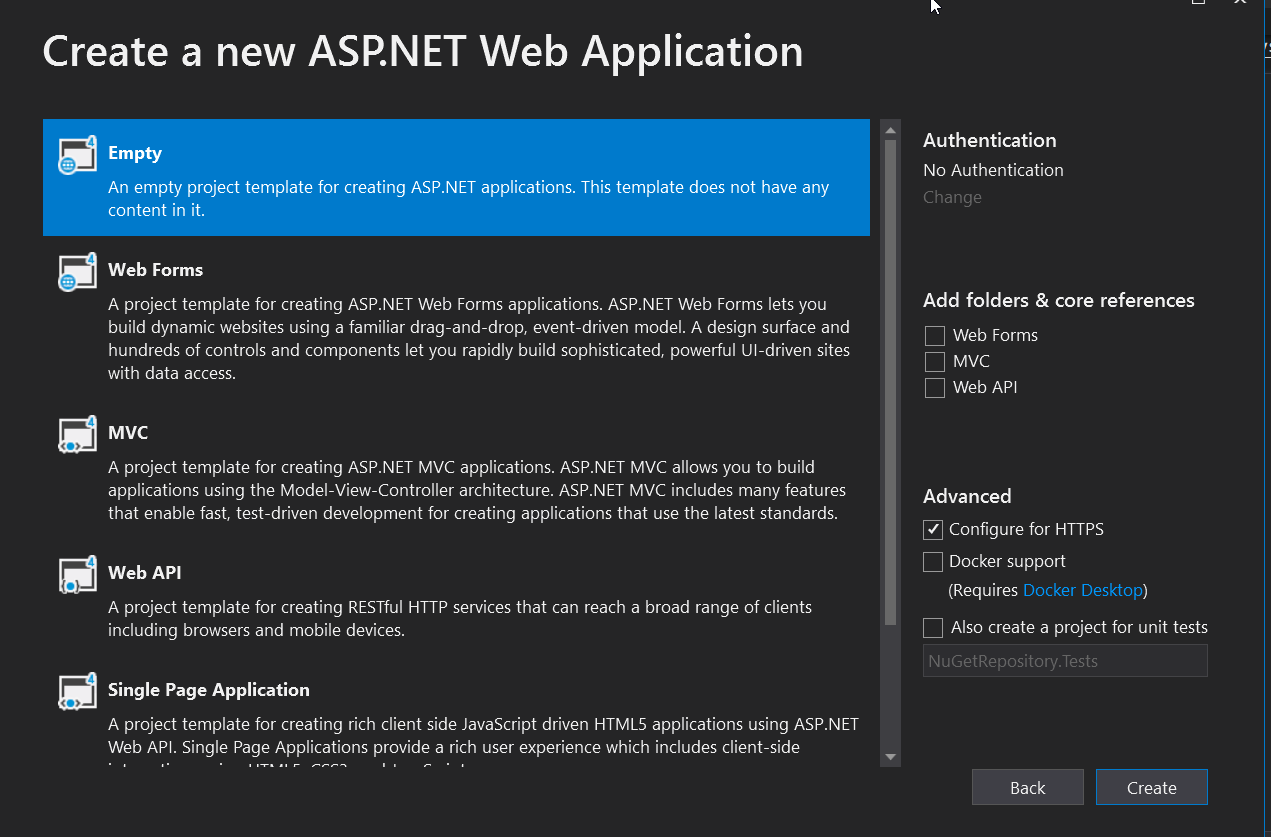
In the screen that will appear simply select the Empty template and then the Create button
Once project has finished loading/being created right-click on the project name in solution explorer and select Manage NuGet Packages
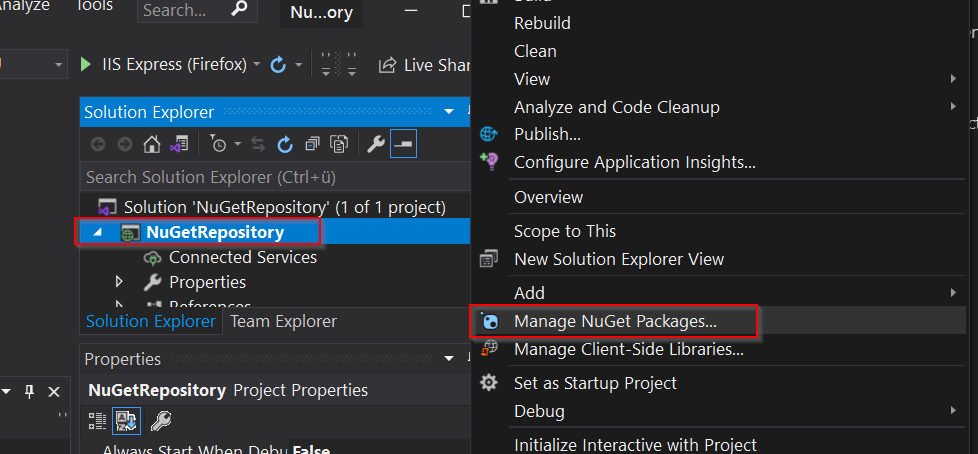
In the NuGetRepository window select the Browse tab and search for package NuGet.Server and click on the Install button.

Keep I am using the latest stable release available at the time of this writing but you can select a different version of the package suiting your needs.
This step will take some time, depending on your connection speed, and a window showing you changes to the solution and asking your confirmation will appear in which case simply click on the Ok button.
Once the installation step is complete I highly recommend to change the build type from Debug, default for new projects, to Release as this will disable all debug logging that is otherwise enabled for the solution.

Once this is done go to Build / Build Solution menu, or press F6 if you’re lazy like me, to package together all files making up the solution.
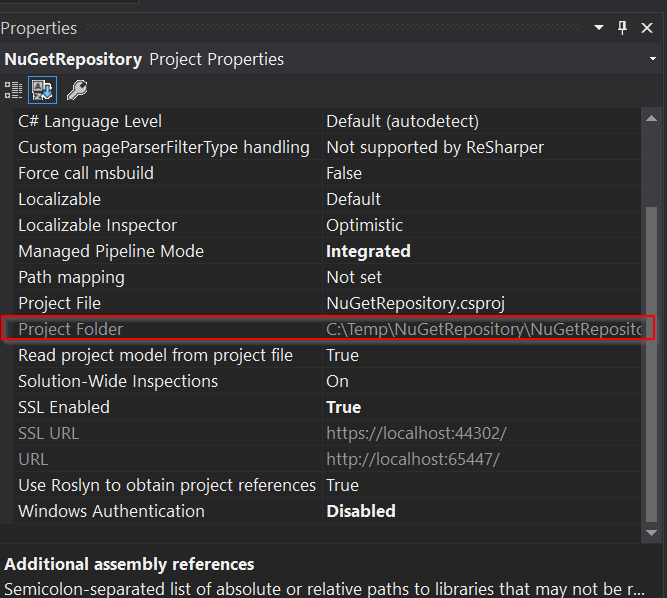
This will create a folder structure, under the path previously specified, containing all files required by the solution. Project path is visible in the Properties window under the Project Folder field
Note: By default solution will be build under the C:\Users\username\source\repos\AppName\AppName\ path
Install required Server Components
Once the solution has been build in Visual Studio move on the server that will be hosting the repository and launch the following cmdlet from an elevated PowerShell session to install required IIS components
# Splatted version
$paramInstallWindowsFeature = @{
    Name = 'Web-Server', 'Web-Net-Ext45', 'Web-Asp-Net45', 'Web-ISAPI-Filter', 'Web-ISAPI-Ext'
    IncludeManagementTools = $true
}

Install-WindowsFeature @paramInstallWindowsFeature

# Long unsplatted version
Install-WindowsFeature Web-Server,Web-Net-Ext45,Web-Asp-Net45,Web-ISAPI-Filter,Web-ISAPI-Ext -IncludeManagementTools
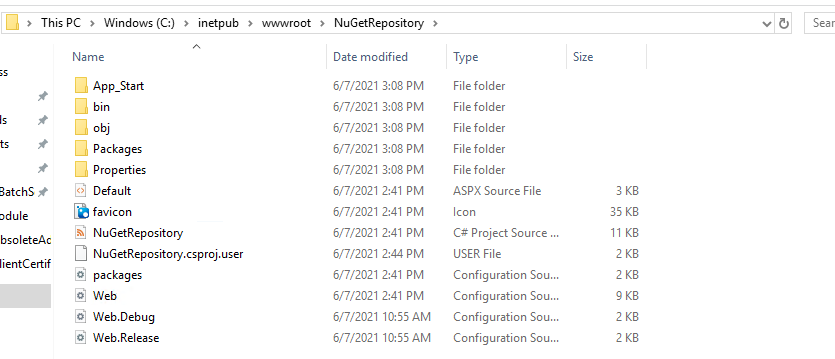
Once all components are in place copy the solution files to a directory on the server with the default being C:\inetpub\wwwroot. Path is not really import and could be anything you’d like, I will just stick with the default.
As a reference here’s how the content of my application folder looks like on my test server
Update Web.Config configuration file
The web.config file is located in the project root folder, assuming default path this will be C:\inetpub\wwwroot\NuGetRepository, open it with a text editor and under the <system.web> section you should see line similar the following (actual .Net Framework version could vary)
  <system.web>
    <compilation debug="true" targetFramework="4.6.1" />
    <!-- maxRequestLength is specified in Kb -->
    <httpRuntime targetFramework="4.6.1" maxRequestLength="30720" />
    <compilation debug="true" targetFramework="4.6" />
  </system.web>
Comment out or delete one of the instances of <compilation> tag so that resultant file will be similar the following
  <system.web>
    <compilation debug="true" targetFramework="4.6.1" />
    <!-- maxRequestLength is specified in Kb -->
    <httpRuntime targetFramework="4.6.1" maxRequestLength="30720" />
  </system.web>
Note: If the web.config file is not updated when opening the IIS Application an Internal Server Error message will be displayed an application won’t work.
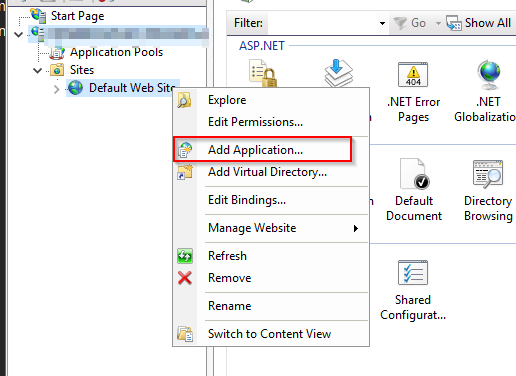
Deploy Application to IIS
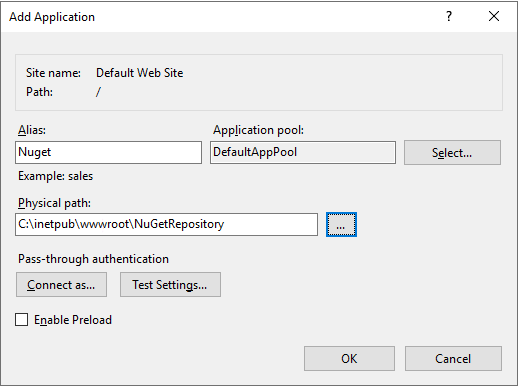
We can finally deploy the NuGet application to IIS to do so open **IIS Manager / Expand
In the window that appears provide a name (alias) for the application and specify the path where application files reside
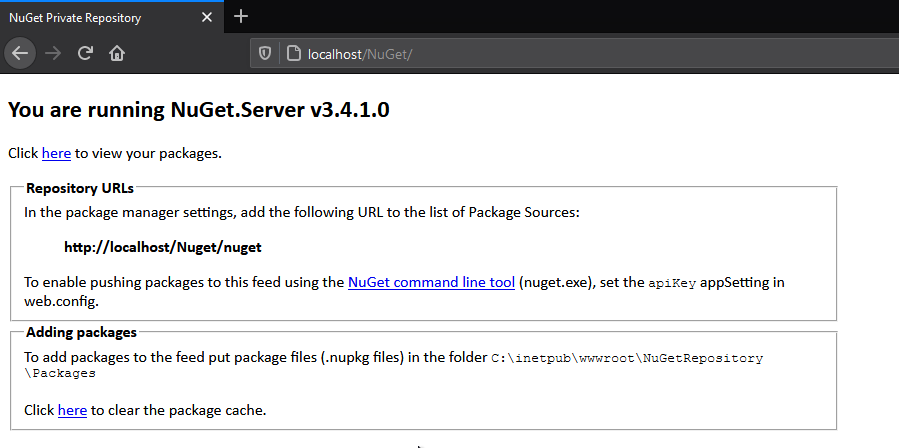
To test the configuration point your browser to http://localhost/Nuget which should yield the following page
Configure Package Directory
In the default configuration packages are stored under the same path where the application lives in the Packages directory, in our example C:\inetpub\wwwroot\Nuget\Packages. This can be changed in the web.config configuration file via the following tag
    <!--
    Change the path to the packages folder. Default is ~/Packages.
    This can be a virtual or physical path.
    -->
    <add key="packagesPath" value="C:\SomePath\Packages" />
Configure Repository API Key
Up to this point the repository is ready and can be used to download packages from it but if we need to upload data, in our example PowerShell modules, to it we would need some form of authentication which in NuGet is accomplished through an API key.
First of all generate a unique API key, I generally use a GUID generated via New-Guid cmdlet, open the web.config file and update the apiKey value as in the following example
    <!--
    Determines if an Api Key is required to push\delete packages from the server.
    -->
    <add key="requireApiKey" value="true" />
    <!--
    Set the value here to allow people to push/delete packages from the server.
    NOTE: This is a shared key (password) for all users.
    -->
    <add key="apiKey" value="<GUID VALUE>" />
If you want to disable authentication all together you can simply set the requireApiKey to false.
Closing notes
This guide should set you in the right path for configuring your own internal PowerShell module repository but this is just the tip of the iceberg.
In the next articles I will explain how to register a repository and push modules to it.
GitHub Link
I have created a GitHub repository where I’ve posted both the package and the full Visual Studio Solution so you can simply download the files and be up and running in no time.
- This is the direct link to the application files that you can simply copy over to IIS
- This is the link to the base repository containing readme, changelog etc.
I will keep this repository up to date when new versions of NuGet are released.
Leave a comment